Minecraft's popularity spans nearly every device, and Chromebooks are no exception. Running on Chrome OS, these convenient devices present a unique challenge for Minecraft installation. But the good news is: yes, you absolutely *can* play Minecraft on your Chromebook! This guide walks you through the process, offering tips for optimal performance.
Table of Contents
- General Information About Minecraft on a Chromebook
- Enabling Developer Mode
- Installing Minecraft on Chromebook
- Running the Game
- How to Play Minecraft on a Chromebook with Low Specs
- Enhancing Performance on Chrome OS
General Information About Minecraft on a Chromebook
For a smooth Minecraft experience on your Chromebook, aim for these minimum specifications:
- System Architecture: 64-bit (x86_64, arm64-v8a)
- Processor: AMD A4-9120C, Intel Celeron N4000, Intel 3865U, Intel i3-7130U, Intel m3-8100Y, Mediatek Kompanio 500 (MT8183), Qualcomm SC7180 or better
- RAM: 4 GB
- Storage: At least 1 GB of free space
These are minimum requirements. If performance is still lagging, we'll offer troubleshooting tips later. Let's dive into installation!
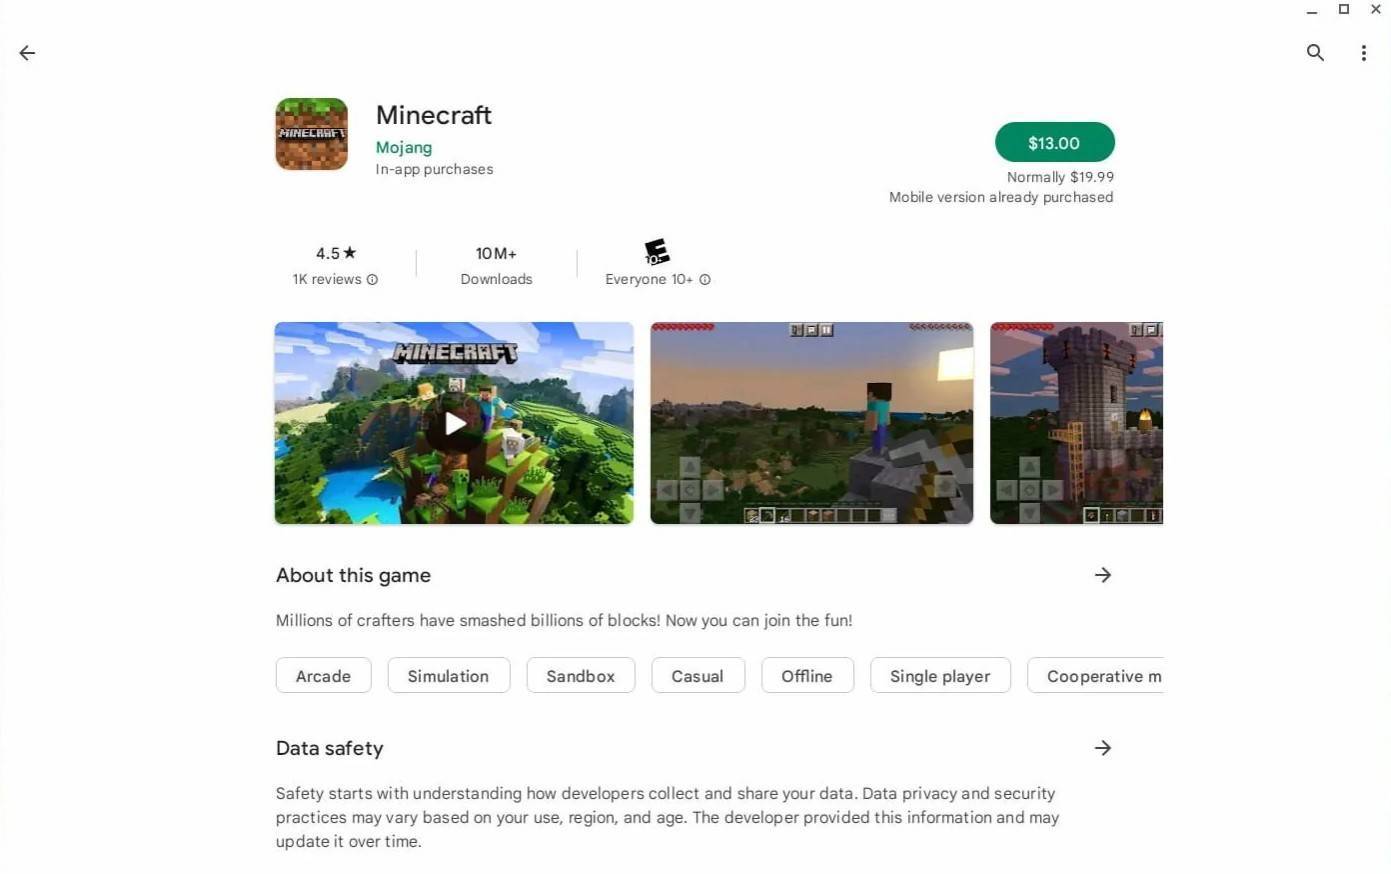
The easiest route is installing the Bedrock Edition directly from the Google Play Store. Simply search for Minecraft, and you'll find it. Note that it costs $20 (or $13 if you already own the Android version). This is a convenient option, especially if you want a quick and hassle-free setup.
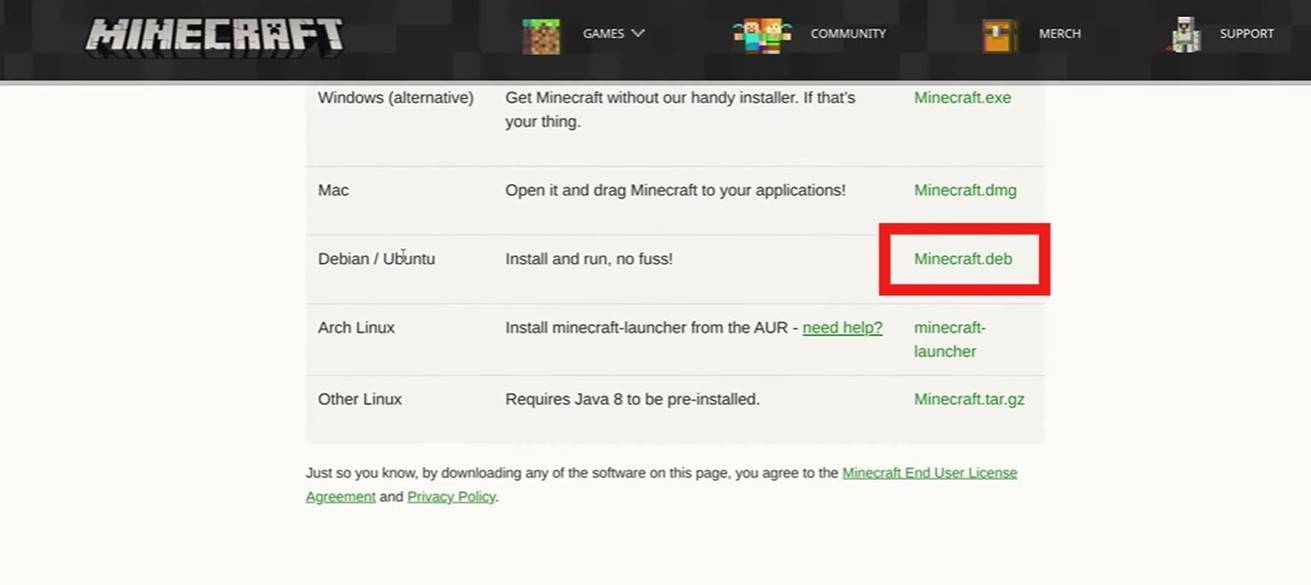
However, if you prefer other versions, remember Chrome OS is Linux-based, and Minecraft has long been compatible. Installation requires a bit more technical know-how, as it differs from Windows. We'll guide you through it step-by-step.
Enabling Developer Mode
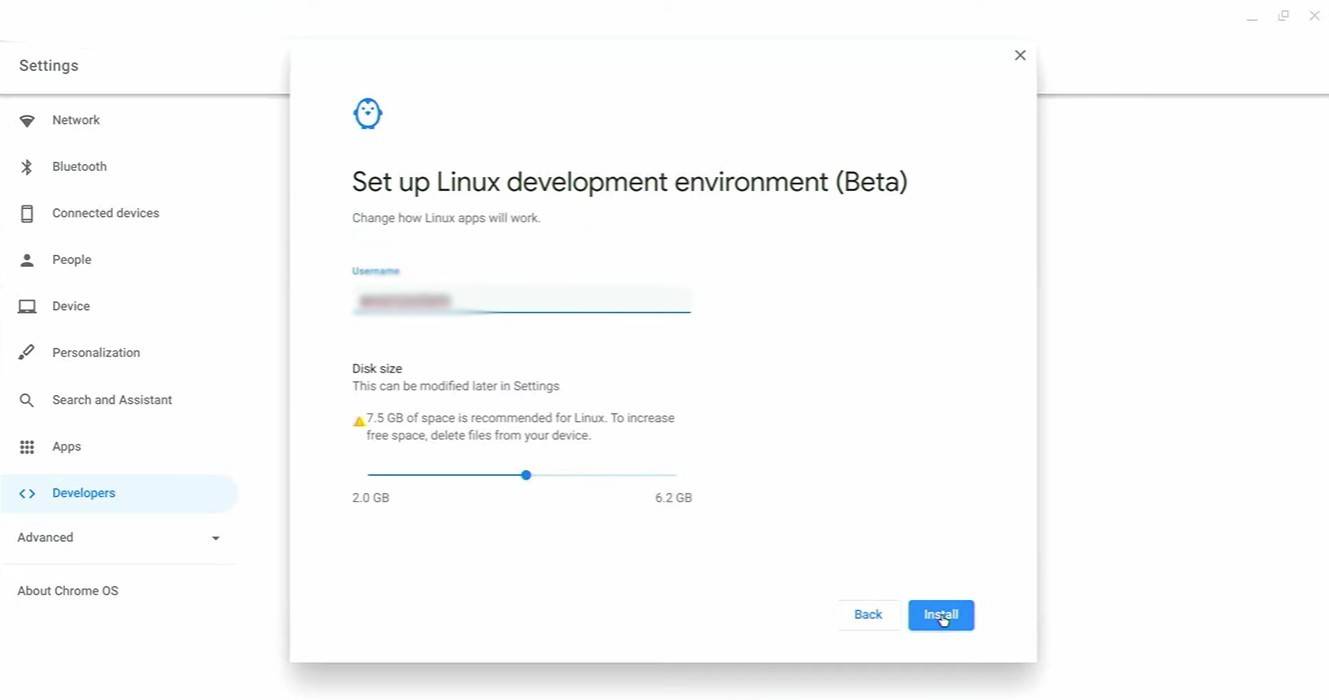
First, you need to enable Developer Mode. Access your Chromebook's settings (similar to a "Start" menu), navigate to the "Developers" section, and enable the "Linux development environment." Follow the on-screen prompts. Once complete, the Terminal (similar to Windows' command prompt) will open, ready for the next steps.
Installing Minecraft on Chromebook
[ttpp]
 Latest Downloads
 Downlaod


 Top News